August 30, 2011

Celebration and Anticipation

As August draws to a close, we have so many reasons to celebrate:  birthdays, anniversaries, coming out of two natural disasters (within 5 days) unscathed, and anticipating the beginning of a brand new chapter of our lives!

anniversary cake

August has always been one of my favorite months.  Yes, it’s hot.  Yes, its arrival means that summer freedom is coming to a close and school will soon be back in session.  But it’s also the month of my birthday!  (And my mom’s; I love that we share the same day.)  For over a decade, it was also the month of an annual extended family beach trip.  And for the last three years, it’s been the month of Brian’s and my wedding anniversary.  So it’s a great month.

white cake slice

This year August was even more eventful than usual.  I spent almost every weekend working on a film (rather than my usual sleeping in and going to the farmers market and cooking and blogging).  I was also in the midst of a will-we-or-won’t-we-be-moving-across-the-country-next-month quandary, which was causing me more than a little anxiety.

white cake with buttercream
Happily, everything seems to be turning out even better than we’d hoped.

dinner at st. arnolds

A couple of days before my birthday, I was offered a wonderful and unique opportunity for a new job at an organization whose work I admire and that is actually in the same field as my graduate degree. (Imagine that.) I accepted the position on the morning of my birthday, which happened to also be the same day as my first earthquake ever. Maybe it means that this coming year is going to be particularly …. vibrant? Moving? Earth-shaking? Or maybe it doesn’t mean anything.

moules frites

The new job means a new city and a cross-country move. Actually, we’re moving back home. We’ll be within driving distance of our families, close to lots of friends, and finally in a position to get a house with a yard, where I’ll finally get to grow some vegetables of my own(!).  

strawberry cake

I've learned a lot in my 5 years in DC. We’ve enjoyed our city life, but we’re at a point where being close to our families is a priority, where the comforts and ease of small-town living are more alluring, and the inconveniences of the city are starting to outweigh the advantages. A five- to ten-minute commute is also pretty appealing.

birthday candlesGuess what?  I blew them all out in one breath.

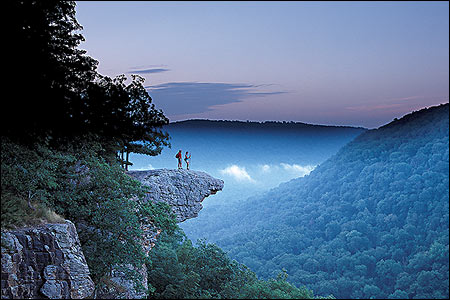
Our destination town is Fayetteville, where Brian and I first met and where we both attended the University of Arkansas. Fayetteville is a charming place nestled in the beautiful Ozark Mountains.  It’s a top college town and boasts a lively arts scene, a brand-new American art museum (nearby), and a 60-stall farmers market.  It’s a place where college football passions run high and cost of living runs low.  It’s also the home of some of my favorite people in the world.  

strawberry cake slice

Oh, but it does get hot there.  And there’s no Trader Joe’s within a 199-mile radius. (The closest one is exactly 200 miles away.  I checked.)  Whole Foods is 180 miles away.  I’m already anxious about where we’ll find our favorite cheeses.  (Yes, I mean you, Santa Teresa.) Is it possible to buy cheese online?   On the upside, there is a great locally owned natural foods store (a co-op, in fact) that I’m excited to explore.

September 28 will officially be our last day in the District.

DC to AR

John F. Kennedy said that “Washington is a city of Southern efficiency and Northern charm.” 

He knew what he was talking about, and there are a number of things we won’t miss about the city, including the WMATA with its myriad problems and those of the DC/MD/VA drivers who refuse to use their blinkers or turn their lights on in the rain.

rooftop view of DC

On the other hand, there are plenty of things we will miss about DC. I’ll miss my kitchen and its humongous island (but hopefully I’ll find a new one with equally excellent counter space). We’ll miss having the year-round Dupont farmers market and our neighborhood14th and U farmers market, Ethiopian food, and great grocery stores.  We’ll miss the U Street Corridor; wine happy hour and bocce at Vinoteca; fried oysters and gypsy jazz at 1905.  I’ll miss the shopping (but not the inconvenience of getting there).  We'll miss impromptu weekend trips to New York City that don't require a plane ticket. We’ll miss the view from our rooftop deck and seeing the Washington Capitals play live.   We’ll miss the parish we’ve grown to love and the beautiful Masses at the Basilica.  Most of all, we’ll miss our DC and New York friends. But we'll have great excuses to come back and visit.

spritz on the roof
So, here’s to August 2011, and all that the next year has to offer!

August 29, 2011

Fresh Lima Beans

Lima beans are not sexy.  No one gets excited about lima beans, right?  What child – or adult for that matter – doesn’t feel a little put-off by the thought of a can of lima beans? 
But have you ever had fresh lima beans?  Like right-off-the-farm fresh?  If you had, you might just think lima beans were pretty fantastic. 

I’d been wanting to try them fresh since I came across them at the market last summer.  I was determined not to miss them this time, so I snagged the first pint I saw. 

Here are a couple of simple, quick, healthy recipes that exemplify the philosophy that food doesn’t have to be complicated to be amazing. A few fresh, quality ingredients and a few minutes in the kitchen are all you need.  This small batch lasted the two of us through 2 ½ meals, but it can also be doubled or tripled for a larger group.  You can jump to the recipes by clicking the links below.

Cooking Fresh Lima Beans
Rustic Lima Beans with Sausage and Bread
Lima Beans and Pasta

Note: Raw lima beans must be cooked before they are eaten.

Cooking Fresh Lima Beans

Yield about 2 ½ cups.

10 ounces (about 2 cups) fresh lima beans (or more)
2 cups of water (per 10 ounces of beans)
¼ teaspoon salt (per 10 ounces of beans)

Rinse beans.  Combine beans and water in a pot and bring to a boil.  Reduce heat to medium-high and continue boiling for 15 minutes.  Drain and rinse beans.

Add salt and ½ cup water and boil an additional 2 minutes.  Remove from heat and allow beans to cool in water (which allows them to absorb the salt).


rustic lima beans with sausage and bread

Rustic Lima Beans with Sausage and Bread

The white wine adds a nice brightness and elevates to another level this otherwise very basic dish.

Serves 2 as a main course.

1 ½ cups cooked lima beans
2 teaspoons olive oil
½ medium yellow onion, chopped
2 teaspoons butter
4 ounces fresh sausage (I used North Mountain Pasture’s Lincolnshire sausage, seasoned with sage, mace, and ginger. Yum.)
½ cup dry white wine
1 clove garlic, cut in half

8 slices baguette or other rustic bread
extra virgin olive oil, for brushing

Rub bread slices with one half of garlic clove and brush lightly with extra virgin olive oil.  Arrange (oiled side up) on broiler-safe baking dish and set aside.

In a large skillet, heat oil over medium heat.  Add onion and cook until translucent, about 4-5 minutes.

Add sausage and cook, stirring and breaking into small pieces with a wooden spoon, until very little pink remains.  Add butter, beans, ½ clove garlic and white wine.  Cook, stirring occasionally, until wine is cooked off.

Meanwhile, turn broiler on high and toast bread until lightly browned, about 3-4 minutes. (Watch the bread closely, as it can go from “almost there” to burnt in no time.)

Serve beans and sausage warm alongside toasted bread.


Lima Beans and Pasta

I particularly love this dish because it’s like a non-soup version of  pasta e fagioli, evoking similar flavors and nostalgia.

Serves 3.

1 cup cooked lima beans
2 teaspoons olive oil
½ medium yellow onion
1 ounce bacon, chopped fine
6 ounces fresh tagliatelle or dried fettuccine
½ cup passata (strained tomatoes)*
salt
pepper
1 ounce parmesan, freshly grated

Fill a medium saucepan about ¾ full of water and set to boil.

Meanwhile, heat oil in a 12-inch skillet over medium heat.  Add onion and cook, stirring occasionally for 2 to 3 minutes.  Add bacon and cook until onions are translucent (about 8 minutes). 

Stir in passata and season with pepper.  If your tomato puree did not already have salt added, season with salt to taste.

When water is boiling, cook pasta a minute or two short of al dente.  Reserve ½ cup of the pasta cooking liquid and drain pasta.  Add pasta and cooking liquid to bean/sauce mixture and cook down for 1-2 minutes.  (The starches in the pasta water and the cooking help the sauce stick to the pasta. 

Serve topped with freshly grated parmesan.

*Passata (or strained tomatoes) is a staple in Italian kitchens.  It’s made from raw tomatoes “passed” through a sieve (hence its name) and packaged without any additives.  Strained tomatoes are becoming more and more common in American grocery stores.  Boinaturae and Pomi are both great brands.  You can also make your own from fresh tomatoes!  If you can’t get strained tomatoes, substitute tomato puree or plain tomato sauce. 

DSC_1666

August 1, 2011

Homemade Hummus from Dried Garbanzo Beans

Getting away from canned foods has meant learning to cook with dried beans.  There are a number of advantages to cooking with dried beans versus canned beans: they’re much cheaper, have more flavor, are free of BPAs, and contain only the amount of salt that you add yourself.

Because using dried beans requires that I plan in advance, getting into the swing of it has been slow-going.  The first time I cooked with dried beans, I was nervous, but the beans turned out great, and I was so excited about how easy the process was; I resolved to cook dried beans again soon.

Weeks and weeks went by, and before I knew it, I was feeling nervous and reluctant again.  But I finally made myself do it.  Once more, I was amazed at how easy it was.  “I must do this again soon!” I told myself.  Can you guess what happened next?  I forgot about dried beans. 

One of my issues was that they tell you soak the beans “overnight,” but they don’t tell you what to do with them the next day.  Well, dear recipe writer, some people don’t have the luxury of staying home all day to cook beans.  They have to leave the kitchen and go to work.  What are they supposed to do with the beans in the mean time? Let them continue to soak?  Will something bad happen to them if they keep soaking? Can I put the whole pot in the fridge?  Do I drain them and put them in the fridge?  Drain them and leave them on the counter? 

I soon realized that “overnight” was code for “8 to 10 hours.”  Oh, okay, so I can soak them while I’m at work and cook them when I get home!  Perfect.  Except that I have to actually remember to put them in the pot before I leave in the morning.  I’ve found that it helps to leave the bag of dried beans sitting on top of my purse the night before.  Nine times out of 10, I’ll realize that they’re there for a reason (and not because I need to take them to work).  Even though I figured out this little soak-the-beans-while-I’m-at-work trick months ago, I still get a little panicky every time I read “soak the beans overnight.”  I just have to keep reminding myself that they can soak by the light of day.

Almost a year later, I’m finally starting to get this dried bean thing; I’ve cooked them twice this week!  Twice!  In one week!  I feel very accomplished.  On Wednesday, we made a pot of black beans to go with our turkey taco salad, and yesterday we made hummus! 

One of the great tragedies of the months and months it took me to come to terms with dried beans was that, in all that time, I didn’t make hummus.  We love hummus around here.  It’s been a go-to party appetizer for years. It’s easy, quick*, healthy, filling, inexpensive, and always a hit.  Brian has been talking about having hummus for months, but if you know me, you know that nothing but the most dire circumstances will motivate me to buy premade anything I am capable of making from scratch.  So it was a great relief to finally make hummus again!  

*Preparing the dried beans takes time, but if you cook a big pot (see below), you can freeze them to have on hand whenever you feel like whipping up a batch of hummus!
DSC_1523

Homemade Hummus (from dried beans)

printable recipe

Preparing the Beans

This recipe makes about 6 cups of beans (2.5 pounds) – enough for 3 batches of hummus.  It can easily be halved or doubled.
1 pound (2 cups) dried garbanzos beans (a.k.a. chickpeas)
½ teaspoon salt (optional)
Pick through the beans, removing any dark or shriveled beans.   Rinse thoroughly in a colander or mesh strainer.
In a medium-sized pot, cover the beans with cool water and soak for 8-10 hours.

Drain the beans.  Return beans to pot and cover with water by about 2 inches.  Bring to a boil and cook for about 2 hours, until the beans are tender.  Add water, as needed, to keep the beans covered.

When the beans are cooked, remove from heat and stir in ½ teaspoon salt, if using.  Allow the beans to cool for 30 minutes.  They will also soak up the salt during this time. 

Drain the beans.  (If desired, you can reserve the cooking liquid to thicken soup.)

Set aside what you will be using immediately and freeze the rest.  The most convenient way to do this is to freeze 2-cup portions in freezer-safe containers.

(Frozen beans can be thawed at room temperature in a bowl of cold water, in the refrigerator, or in the microwave.)

cooked garbanzo beans

Making the Hummus

Yield about 4 cups.
2 cups (12 ounces) cooked garbanzo beans
¼ cup tahini (sesame paste)
3 tablespoons extra virgin olive oil
2 tablespoons water
juice of 1 lemon (2-3 tablespoons)
1 clove of garlic
1 teaspoon ground cumin
¼ teaspoon salt
¼ teaspoon freshly ground black pepper
Combine all ingredients in the bowl of a food processor.  Process until smooth.  If the hummus is too dry, add water and/or olive oil to reach desired consistency.

Refrigerate until ready to serve.

Note: If you prefer your hummus particularly garlicky or lemony, adjust seasonings to taste.


DSC_1502